This is for somewhat experienced Photoshop Users. I am going to be using Adobe Photoshop CS3 Extending in this tutorial. So, here we go.
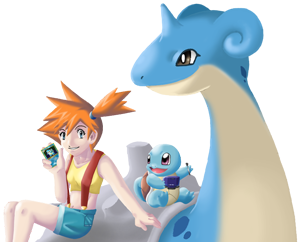
1) Open up your render, I am going to be using this one.

Then, make your canvas, I used 400x120.

Then, drag in your render, and find a good place for him/her/it/whatever it is.

On Layer1, take the paint bucket tool, and make it black.

Then, duplicate the render layer twice, so now you have three of them, make the 2 new ones invisible, and on the 1st one, Blur>Radial Blur- 100,Zoom,Best.

Then make the next one visible, and set it to color dodge.

Make the next one visible, duplicate it, and set the new one invisible, and smudge copy 2 with these settings. With the default sized 36 brush.


After your smudged, make the other layer of the render visible, and set the smudged one to Color Burn, or at least what you think looks good. This is what mine came out like.

Now, make a new layer, Image>Apply Image. Filter>Distort>Displace, keep the settings default, and find a good PSD you've saved before, set it to lighten, and erase what doesn't look good.

Now, make a new layer, get some Vector/Splatter brushes, and use some, just a little bit, in white. Then, make a new layer, right click the layer, and click on Create Clipping Mask, and move the make focus (your render) towards the brushes.

If it doesn't work, either just don't do it, just add the brushes, or look up a Clipping Mask tutorial.
Then, add a Gradient Map.
I used.
Default Purple/Orange, set to Soft Light, at 30%
Default Black/White, set to Luminosity, at 40-70%
Default Black/White, set to Normal, at 6-15%
Make sure you use them in that order, and you can add any other Gradient Maps as well.

I didn't have enough light and color in there, so I lowered the opacity of the Luminosity Gradient Map, and added a Default Red/Yellow/Blue Gradient Map at Soft Light to 20%
Time to add Text.
Just place it somewhere, where its not too much on focus, and don't make it too big. I used the biohazard font.
1st thing I did was set it Soft Light, and used these settings.


And it came out like this.

Then I added a 1px White Border, Center, then on top of that, I did a 2px Black Border, Outside. It looked like this.

Then all that's really left is minor details, and sharpen.
Make a new layer, Image>Apply Image. Filter>Sharpen>Sharpen, lower the opacity if needed.
My minor details included another Gradient Map, and a Small C4D.

FIN!
If you have any questions, just post them here, I hoped your like this tutorial. And stay in tune for more tutorials, and graphics.
Sincerely, JK
1) Open up your render, I am going to be using this one.
Then, make your canvas, I used 400x120.
Then, drag in your render, and find a good place for him/her/it/whatever it is.
On Layer1, take the paint bucket tool, and make it black.
Then, duplicate the render layer twice, so now you have three of them, make the 2 new ones invisible, and on the 1st one, Blur>Radial Blur- 100,Zoom,Best.
Then make the next one visible, and set it to color dodge.
Make the next one visible, duplicate it, and set the new one invisible, and smudge copy 2 with these settings. With the default sized 36 brush.
After your smudged, make the other layer of the render visible, and set the smudged one to Color Burn, or at least what you think looks good. This is what mine came out like.
Now, make a new layer, Image>Apply Image. Filter>Distort>Displace, keep the settings default, and find a good PSD you've saved before, set it to lighten, and erase what doesn't look good.
Now, make a new layer, get some Vector/Splatter brushes, and use some, just a little bit, in white. Then, make a new layer, right click the layer, and click on Create Clipping Mask, and move the make focus (your render) towards the brushes.
If it doesn't work, either just don't do it, just add the brushes, or look up a Clipping Mask tutorial.
Then, add a Gradient Map.
I used.
Default Purple/Orange, set to Soft Light, at 30%
Default Black/White, set to Luminosity, at 40-70%
Default Black/White, set to Normal, at 6-15%
Make sure you use them in that order, and you can add any other Gradient Maps as well.
I didn't have enough light and color in there, so I lowered the opacity of the Luminosity Gradient Map, and added a Default Red/Yellow/Blue Gradient Map at Soft Light to 20%
Time to add Text.
Just place it somewhere, where its not too much on focus, and don't make it too big. I used the biohazard font.
1st thing I did was set it Soft Light, and used these settings.
And it came out like this.
Then I added a 1px White Border, Center, then on top of that, I did a 2px Black Border, Outside. It looked like this.
Then all that's really left is minor details, and sharpen.
Make a new layer, Image>Apply Image. Filter>Sharpen>Sharpen, lower the opacity if needed.
My minor details included another Gradient Map, and a Small C4D.
FIN!
If you have any questions, just post them here, I hoped your like this tutorial. And stay in tune for more tutorials, and graphics.
Sincerely, JK
")
