Yo Yo Yo YO! Waassaawp everyone! George2FRESH here to bring you what you've all PM'd me and asked for..
A Banner and Avatar making Tutorial!!
... kinda sorta.
Well ever since I opened up my shop, I've had so many people PM'ing me asking to teach them, or tutor them on how to make good quality banners and avatars. Now I'm not a teacher.. at all, but I thought it'd be cool to try to help all of you artists out there to the best of my extent. So, without further ado, here goes!
So, you're an artist and want to make awesome banners and avatars that you can show off to your friends huh? You want to be the best banner maker ever? Well, sorry, but I can't help you there. The only thing I can do, is give you some of my personal tips and hints to help you get started. Where you go from there is completely up to you. We all have our own styles, and how far you go with those and how creative you can become all lies in your.. *makes rainbow with hands* IMAGINATION. =]
First, let's start off with some artist rules. Rules?! What?! Ok more like.. guidelines? Guidelines to this thread.
1) To start, this is not an actual "Tutorial". I didn't sit here to tell you guys how to use certain programs, how to install them, how to use them.. no. What this is, is just a bunch of hints and tips that I use myself when creating artwork. And of course, this is not just limited to me. Do you have any ideas/hints/tips to give people? Not a problem! Just PM me your ideas, and I'll post them up and give you credit.
2) I'm not here to tell you exactly what to do. Like I've said, this is what I myself do. You can always take what I do and add your own personal feel to it. After all, without our own personal feel, artwork wouldn't be... artwork!
3) The program I will be using to show you examples is Adobe Photoshop 7.0 along with MS Paint. I know a lot of you have different programs such as CS, GIMP, even MS Paint. I don't have experience with any of those (excluding MS Paint) so some of the stuff I do, you won't be able to use in other programs. Maybe you will, maybe you won't.
4) This is not limited to banners and avatars. I'm not a spriter, or any of that, but some of the tips I give you, you can use to make things other than banners and avatars.
5) There is NOT a right or wrong way to do things. I know some people won't agree to how I do things. Like I said, everyone has their own style. This is not something to tell you "You're doing it wrong!". This is just to give you some input on what to think when making things. You can decide whether or not to use them. Please no PM's or responses saying "Don't do it that way, that way sucks..". Something more like "Did you know if you do it this way, you could end up with this. Resulting in something that looks like this.." you know?
Alright, now that that's all out of the way, let's finally get started shall we?
For this "Tutorial", I use "Tutorial" because I can't think of any other way to say it, I will be making an example banner. I will go through the steps that I use to make some artwork so you can see what I think when making artwork. Remember, you can use these simple/basic effects for any kind of artwork!
1) Making the Background
When I start a banner, the first thing I do is save any images that I want to use. If it's a customer, I'll use the images they want. For this banner, I'll be using one of my favorite Pokemon, as well as my favorite Pokemon cards, Darkrai Lv. X.

- So now I have my image. I usually use other images, but for this one, I'll just be using one. What I do now is I look at the image, look at the color scheme. And I decide on a background. But first, let's decide the size of the whole entire banner. There's 2 types of styles I use for banner making:
* The first style is a regular square banner. Sometimes I might change up the shape. Thinking out of the box. I might make a wide hexagon, or circle, who knows. All depends on the theme of the banner.
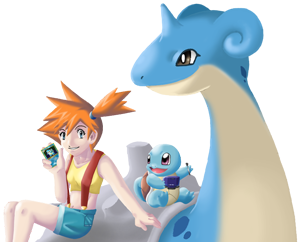
* The second style is what I like to call the "Thisbemoo" style. I wish she were here so I can thank her lol. The reason I call it this is because she is the first one I saw use this kind of style, and it inspired me to try it out. This has to do with making the main picture (in this case, Darkrai), bigger than the banner. Giving it the "Popping out Effect".
It looks something like this:

^^That's just an example ^^
For this banner however, I'll just be doing a regular original rectangle sized banner. The size I usually like to use is 450 x 150. Of course you can go bigger, you can go smaller. Whichever one fits you. So open up a new window and set the width to w/e you choose. Mine will be 450/150. I made it blue so you can see it better.

- Ok, I have the size of the banner. Now I know my limits on how far I can go. So like I said, I look at the picture, look at the color scheme and try to come up with something that matches the picture. Me personally, I wouldn't mix Darkrai with a rainbow or anything lol. But hey, if that's what you want to do, go right ahead. It's YOUR banner. Now people might think:
"Darkrai.. black.."
They'd make a black background, slap Darkrai on there, and call it a day. BLEH! For me, that's too plain. But again, your banner, your choice. For me, I'd think something like:
"Darkrai, black, shadow, dark, intimidating. Hints of green for a ball. Shadow effects. Maybe hidden in midst to give it that mysterious effect. For that I'll need to use clouds.."
I may not use ALL of those ideas, but I will def. experiment and see what works with what. Now you may be thinking "How would you get those kind of effects?" Well... I'll be honest, I kinda.. cheat. lol. I go around maybe Deviantart.com and download brushes compatible with Photoshop. Sorry MS Paint users, but what you got is what you're stuck with. I already have a few saved on my comp so I'll be using those.
- To give the banner all these different effects, I'll be making different layers for each effect.
Example:
Layer 1: Black Background

Layer 2: Shades of Gray and a little bit of red for the darkness/intimidating effect

Layer 3: Some grunge effects and clouds for the mysterious effects

This is what my semi-final background would look like. I say "semi-final" because I might add more later.
There's my background. Minimize it, and open up a new window. This is where you'll be opening up your image, and adding it to the banner. This is our next step.
2) Adding the Image
So I have the card, and what I want to first do is take the main part I want from the card. When making a pokemon banner, I won't be using the whole card. If it's a picture, I won't be using the whole background (only because I make my own backgrounds.) I simply just take what I want from the picture. So for this one, I'll be cropping (cutting out) Darkrai from the whole card.
- To do this, if you're using Photoshop or anything else rather than Paint, there are a few types of tools you can use to cut out pictures:
You have the square cutting tool:

- This is only for taking chunks of a picture out. Keep in mind however, this only cuts out things in the shape of a square. Not recommended for cutting out pictures.
It looks a little something like this:
Click Here for Example
You have the Magnetic Lasso Tool:

- This tool gives you free hand cropping. It cuts out in any shape, any size. However, when you use this, once you click, you don't have to click anymore. It follows your mouse around and clicks for you. Sounds conveniant right? Sorta. I wouldn't suggest this tool as it might click when you don't want to.
This is what it looks like:
Click Here for Example
And lastly, you have the Polygonal Lasso Tool:

- Much like the magnetic lasso tool, using this tool also gives you free hand cropping. But the only difference is, YOU do the clicking. You stop and start where you want, and when you want. This is the tool I use.
This is what it looks like in use:
Click Here for Example
I don't know if GIMP or CS Photoshop has this tool, so I wouldn' t know what to use in those cases. What I see a lot of people using though, is MS Paint. This is not really a good program to cut out images as it gives you the pixely cut outs, and leaves excess background, making the cut out not look so real.
Here's the difference as to what I'm talking about:
This is what a picture looks like when cropped with the lasso tool. The one on the left was cropped using the Polygonal Lasso Tool in Photoshop. The one on the left was cropped using MS Paint. See how when you use MS Paint, it leaves some pixely edges to the image? That's what you'd want to avoid in your artwork.

See the difference? Using the lasso tool gives you more of a clean cut out rather than the pixely edges.
Alright, after using the P. Lasso Tool, you should now have a moving border like thing around your image, like moving lines? Cut it out using "Ctrl + X" or by right clicking and clicking "Cut". So now, you have a card, with no image. Now let's add the picture you just cut out to the background.
3) Inserting the Image
- If you have followed correctly so far, you should have open 2 different windows: One window with your background, and the other window with your card with no image. You should have a picture that you cut out that's ready to be pasted.
- You can now close the window with your card so you have more space. Open up your window with your background, and press "Ctrl + V" or right click and click "Paste" to insert the image you just cut out.
- What I find myself with is a background, with an oversized image. Now I click the "Arrow" tool, and change the size of the picture to fit the banner. Now you don't ALWAYS have to make the WHOLE picture fit in the background, you can always just use part of it. So what I'll be doing is putting Darkrai all the way to the left of the banner so I have room for text and all of that.
After that is done, it'll look something like this:

Bam, background, with Darkrai on it. Now what I would consider is blending in Darkrai to the background, so that way, it doesn't have that "Copy and Pase" effect, even though that's what you used, you don't want to make it look obvious. How will I go about blending in Darkrai to the background? I think, "What did I use to make the background in the first place?". And I think back "Oh ok, some gray, some red, grunge effects, and some clouds". So once again, I'll make new layers for each new effect, and put some around the banner. I don't want to totally cover Darkrai or it'll totally take away the main point of the banner.
Now it looks a little something like this:

Adding More Effects to the Image Itself:
- To me, it doesn't look right. What I see now is a dark intimidating background, with a bright Darkrai. So to fix that and let Darkrai match the background, is tone his colors down. I'm going to do that by changing the hue/saturation and lean it towards Black and White so that the colors aren't that bright. After that, I'll darken him a little. But that's not all. I like to mess around, so what I decided to do is drop some shadows in there. Make it look like Darkrai is popping out a little. I might give him a little red aura around him. I also duplicated him, moved the duplicate over to the right, and changed the transparency.
You can see all those effects here:

Quick Tips:
- Copying and pasting and just blending it in with the background is very basic. What I like to do it play around with the image. I might add a drop shadow to it. I might copy the layer, move it a little, and change the transparency. Always try to use different effects with your pictures to make it stand out. Experiment with it, move it around, duplicate it, whatever you want to do with it.
- Think about the placement of the pictures you're using, especially if you're using more than 1 image. You don't want to have random images in random spots, that will make the banner not flow too well. Placing images in the right spot will give your banner nice "Fung-Shui" as I like to call it. It's easy on the eyes of the people that will be looking at it.
So that's done, now to my next step, inserting your Text.
4) Adding Text
- Alot of people like to add text to their banner. they may have their username, their team name, w/e. For this, I'll just simply put "Darkrai" on my banner. To do that, I take the Text tool, grab a cool looking font, use a size that's not too big, not too small, and write "Darkrai".

- Now just like the picture, I wouldn't want the text to have a copy and paste effect. So what I do is add some other effects/graphics to it. I might add a drop shadow to it, a border, or whatever fits. For PS 7.0 all I have to do is right click the layer, click "Blending Options" and click what I want. This will vary depending on what program you may be using.
The Finished Text will end up looking like this:

- NEVER FEAR MS PAINT USERS! You can do this too! Now just because you're using MS Paint, doesn't mean you can't at least drop a shadow to it! You can add effects also. I know this because this is how I started. And I'll show you how.
- Click your "Text Tool" and write what you want in Black.

- Now, make another text box, and write the same thing, but in any color you want. In this case, I'll just use blue.

- Next, select your "Select Tool" in the top right hand corner of your tool box, make a box around your different colored text, and place it directly on top of your black text. If you show a little bit of the black text, you can now have somewhat of a "Shadow" effect. Move the text around to what you like.
Making it look something like this:

- You can see that even with MS Paint, you can still do some cool effects.
Tips for Adding Text to your Work:
1) Don't just use ANY font. I would suggest trying to pick a font that suits the theme of your banner.
2) Think about the placement of your text. Try not to let it cover the image, or just put it smack dab in the middle.
3) Make it flashy, readable, and spell correctly! lol. After all, the text is the main thing people will be looking at when they see your banner. So might as well make it look nice.
4) If you know how to download and install fonts, I suggest roaming and surfing the internet for some cool looking ones. That way you're not just limited to your default ones.
5) Watermark
- Your last and final mark on your banner. A Watermark is a little symbol you put on all your artwork to show that it's YOU that made it, and no one else. It can be anything from a sprite, to initials. Mine is simply ©G2F, and you can find it usually in any corner of the banner.
- There aren't really any tips I can give you on your watermark. The only thing I can say is don't let it take away from the banner. But make sure it's some what seeable so when people see it they can say "Oh... "insert your name" made this, very nice".
Here is the final Product:

And there you have it Boys and Girls. The end of my tutorial. I hope you all took something away from this, and hope that I have helped a few of you. This will be edited here and there with other peoples Ideas and everything. To start, here's some of MY last minute tips that you can think of when making artwork:
George2FRESH:
1) Don't be afraid to experiment! Experiment is half the creativity. If you don't experiment, you'll never know how far your imagination can take you.
2) Try different styles. Sticking with one style is alright, but would you want ALL your artwork to look the same?
3) Play around with effects: Shadowing, Transparencies, lighting, glows, etc. to make your artwork really flashy.
4) NEVER give up. PRACTICE PRACTICE PRACTICE. When I first got Photoshop, I didn't know what to do, how to start. And it sat on my computer for about 2 months before I started using it. It took me another 2-3 months to finally get it down.
5) Take a look around at other peoples works. Get ideas, see what they did and try to do it yourself.
6) You don't have to stick with what you've got. You can change the color of things, the transparency, whatever you want.
7)Use your mind to create things you don't think you can. Is your picture missin part of it's tail? Draw one. If you take a look at my Photobucket, and look at the Garchomp banner, you can see it has the other half his tail. If you look at the tail on the card, it's missing. I just simply cropped it out, copied it, flipped it, and pasted it. Didn't notice huh? It's those kind of things that make you feel really smart once you complete it. =]
And so it is done. Thanks for reading everyone, hope you had fun! Take care, and Happy Art-Making!
Any questions/comments/suggestions feel free to PM me
-G2F
A Banner and Avatar making Tutorial!!
... kinda sorta.
Well ever since I opened up my shop, I've had so many people PM'ing me asking to teach them, or tutor them on how to make good quality banners and avatars. Now I'm not a teacher.. at all, but I thought it'd be cool to try to help all of you artists out there to the best of my extent. So, without further ado, here goes!
So, you're an artist and want to make awesome banners and avatars that you can show off to your friends huh? You want to be the best banner maker ever? Well, sorry, but I can't help you there. The only thing I can do, is give you some of my personal tips and hints to help you get started. Where you go from there is completely up to you. We all have our own styles, and how far you go with those and how creative you can become all lies in your.. *makes rainbow with hands* IMAGINATION. =]
First, let's start off with some artist rules. Rules?! What?! Ok more like.. guidelines? Guidelines to this thread.
1) To start, this is not an actual "Tutorial". I didn't sit here to tell you guys how to use certain programs, how to install them, how to use them.. no. What this is, is just a bunch of hints and tips that I use myself when creating artwork. And of course, this is not just limited to me. Do you have any ideas/hints/tips to give people? Not a problem! Just PM me your ideas, and I'll post them up and give you credit.
2) I'm not here to tell you exactly what to do. Like I've said, this is what I myself do. You can always take what I do and add your own personal feel to it. After all, without our own personal feel, artwork wouldn't be... artwork!
3) The program I will be using to show you examples is Adobe Photoshop 7.0 along with MS Paint. I know a lot of you have different programs such as CS, GIMP, even MS Paint. I don't have experience with any of those (excluding MS Paint) so some of the stuff I do, you won't be able to use in other programs. Maybe you will, maybe you won't.
4) This is not limited to banners and avatars. I'm not a spriter, or any of that, but some of the tips I give you, you can use to make things other than banners and avatars.
5) There is NOT a right or wrong way to do things. I know some people won't agree to how I do things. Like I said, everyone has their own style. This is not something to tell you "You're doing it wrong!". This is just to give you some input on what to think when making things. You can decide whether or not to use them. Please no PM's or responses saying "Don't do it that way, that way sucks..". Something more like "Did you know if you do it this way, you could end up with this. Resulting in something that looks like this.." you know?
Alright, now that that's all out of the way, let's finally get started shall we?
For this "Tutorial", I use "Tutorial" because I can't think of any other way to say it, I will be making an example banner. I will go through the steps that I use to make some artwork so you can see what I think when making artwork. Remember, you can use these simple/basic effects for any kind of artwork!
1) Making the Background
When I start a banner, the first thing I do is save any images that I want to use. If it's a customer, I'll use the images they want. For this banner, I'll be using one of my favorite Pokemon, as well as my favorite Pokemon cards, Darkrai Lv. X.
- So now I have my image. I usually use other images, but for this one, I'll just be using one. What I do now is I look at the image, look at the color scheme. And I decide on a background. But first, let's decide the size of the whole entire banner. There's 2 types of styles I use for banner making:
* The first style is a regular square banner. Sometimes I might change up the shape. Thinking out of the box. I might make a wide hexagon, or circle, who knows. All depends on the theme of the banner.
* The second style is what I like to call the "Thisbemoo" style. I wish she were here so I can thank her lol. The reason I call it this is because she is the first one I saw use this kind of style, and it inspired me to try it out. This has to do with making the main picture (in this case, Darkrai), bigger than the banner. Giving it the "Popping out Effect".
It looks something like this:
^^That's just an example ^^
For this banner however, I'll just be doing a regular original rectangle sized banner. The size I usually like to use is 450 x 150. Of course you can go bigger, you can go smaller. Whichever one fits you. So open up a new window and set the width to w/e you choose. Mine will be 450/150. I made it blue so you can see it better.
- Ok, I have the size of the banner. Now I know my limits on how far I can go. So like I said, I look at the picture, look at the color scheme and try to come up with something that matches the picture. Me personally, I wouldn't mix Darkrai with a rainbow or anything lol. But hey, if that's what you want to do, go right ahead. It's YOUR banner. Now people might think:
"Darkrai.. black.."
They'd make a black background, slap Darkrai on there, and call it a day. BLEH! For me, that's too plain. But again, your banner, your choice. For me, I'd think something like:
"Darkrai, black, shadow, dark, intimidating. Hints of green for a ball. Shadow effects. Maybe hidden in midst to give it that mysterious effect. For that I'll need to use clouds.."
I may not use ALL of those ideas, but I will def. experiment and see what works with what. Now you may be thinking "How would you get those kind of effects?" Well... I'll be honest, I kinda.. cheat. lol. I go around maybe Deviantart.com and download brushes compatible with Photoshop. Sorry MS Paint users, but what you got is what you're stuck with. I already have a few saved on my comp so I'll be using those.
- To give the banner all these different effects, I'll be making different layers for each effect.
Example:
Layer 1: Black Background
Layer 2: Shades of Gray and a little bit of red for the darkness/intimidating effect
Layer 3: Some grunge effects and clouds for the mysterious effects
This is what my semi-final background would look like. I say "semi-final" because I might add more later.
There's my background. Minimize it, and open up a new window. This is where you'll be opening up your image, and adding it to the banner. This is our next step.
2) Adding the Image
So I have the card, and what I want to first do is take the main part I want from the card. When making a pokemon banner, I won't be using the whole card. If it's a picture, I won't be using the whole background (only because I make my own backgrounds.) I simply just take what I want from the picture. So for this one, I'll be cropping (cutting out) Darkrai from the whole card.
- To do this, if you're using Photoshop or anything else rather than Paint, there are a few types of tools you can use to cut out pictures:
You have the square cutting tool:
- This is only for taking chunks of a picture out. Keep in mind however, this only cuts out things in the shape of a square. Not recommended for cutting out pictures.
It looks a little something like this:
Click Here for Example
You have the Magnetic Lasso Tool:
- This tool gives you free hand cropping. It cuts out in any shape, any size. However, when you use this, once you click, you don't have to click anymore. It follows your mouse around and clicks for you. Sounds conveniant right? Sorta. I wouldn't suggest this tool as it might click when you don't want to.
This is what it looks like:
Click Here for Example
And lastly, you have the Polygonal Lasso Tool:
- Much like the magnetic lasso tool, using this tool also gives you free hand cropping. But the only difference is, YOU do the clicking. You stop and start where you want, and when you want. This is the tool I use.
This is what it looks like in use:
Click Here for Example
I don't know if GIMP or CS Photoshop has this tool, so I wouldn' t know what to use in those cases. What I see a lot of people using though, is MS Paint. This is not really a good program to cut out images as it gives you the pixely cut outs, and leaves excess background, making the cut out not look so real.
Here's the difference as to what I'm talking about:
This is what a picture looks like when cropped with the lasso tool. The one on the left was cropped using the Polygonal Lasso Tool in Photoshop. The one on the left was cropped using MS Paint. See how when you use MS Paint, it leaves some pixely edges to the image? That's what you'd want to avoid in your artwork.
See the difference? Using the lasso tool gives you more of a clean cut out rather than the pixely edges.
Alright, after using the P. Lasso Tool, you should now have a moving border like thing around your image, like moving lines? Cut it out using "Ctrl + X" or by right clicking and clicking "Cut". So now, you have a card, with no image. Now let's add the picture you just cut out to the background.
3) Inserting the Image
- If you have followed correctly so far, you should have open 2 different windows: One window with your background, and the other window with your card with no image. You should have a picture that you cut out that's ready to be pasted.
- You can now close the window with your card so you have more space. Open up your window with your background, and press "Ctrl + V" or right click and click "Paste" to insert the image you just cut out.
- What I find myself with is a background, with an oversized image. Now I click the "Arrow" tool, and change the size of the picture to fit the banner. Now you don't ALWAYS have to make the WHOLE picture fit in the background, you can always just use part of it. So what I'll be doing is putting Darkrai all the way to the left of the banner so I have room for text and all of that.
After that is done, it'll look something like this:
Bam, background, with Darkrai on it. Now what I would consider is blending in Darkrai to the background, so that way, it doesn't have that "Copy and Pase" effect, even though that's what you used, you don't want to make it look obvious. How will I go about blending in Darkrai to the background? I think, "What did I use to make the background in the first place?". And I think back "Oh ok, some gray, some red, grunge effects, and some clouds". So once again, I'll make new layers for each new effect, and put some around the banner. I don't want to totally cover Darkrai or it'll totally take away the main point of the banner.
Now it looks a little something like this:
Adding More Effects to the Image Itself:
- To me, it doesn't look right. What I see now is a dark intimidating background, with a bright Darkrai. So to fix that and let Darkrai match the background, is tone his colors down. I'm going to do that by changing the hue/saturation and lean it towards Black and White so that the colors aren't that bright. After that, I'll darken him a little. But that's not all. I like to mess around, so what I decided to do is drop some shadows in there. Make it look like Darkrai is popping out a little. I might give him a little red aura around him. I also duplicated him, moved the duplicate over to the right, and changed the transparency.
You can see all those effects here:
Quick Tips:
- Copying and pasting and just blending it in with the background is very basic. What I like to do it play around with the image. I might add a drop shadow to it. I might copy the layer, move it a little, and change the transparency. Always try to use different effects with your pictures to make it stand out. Experiment with it, move it around, duplicate it, whatever you want to do with it.
- Think about the placement of the pictures you're using, especially if you're using more than 1 image. You don't want to have random images in random spots, that will make the banner not flow too well. Placing images in the right spot will give your banner nice "Fung-Shui" as I like to call it. It's easy on the eyes of the people that will be looking at it.
So that's done, now to my next step, inserting your Text.
4) Adding Text
- Alot of people like to add text to their banner. they may have their username, their team name, w/e. For this, I'll just simply put "Darkrai" on my banner. To do that, I take the Text tool, grab a cool looking font, use a size that's not too big, not too small, and write "Darkrai".
- Now just like the picture, I wouldn't want the text to have a copy and paste effect. So what I do is add some other effects/graphics to it. I might add a drop shadow to it, a border, or whatever fits. For PS 7.0 all I have to do is right click the layer, click "Blending Options" and click what I want. This will vary depending on what program you may be using.
The Finished Text will end up looking like this:
- NEVER FEAR MS PAINT USERS! You can do this too! Now just because you're using MS Paint, doesn't mean you can't at least drop a shadow to it! You can add effects also. I know this because this is how I started. And I'll show you how.
- Click your "Text Tool" and write what you want in Black.
- Now, make another text box, and write the same thing, but in any color you want. In this case, I'll just use blue.
- Next, select your "Select Tool" in the top right hand corner of your tool box, make a box around your different colored text, and place it directly on top of your black text. If you show a little bit of the black text, you can now have somewhat of a "Shadow" effect. Move the text around to what you like.
Making it look something like this:
- You can see that even with MS Paint, you can still do some cool effects.
Tips for Adding Text to your Work:
1) Don't just use ANY font. I would suggest trying to pick a font that suits the theme of your banner.
2) Think about the placement of your text. Try not to let it cover the image, or just put it smack dab in the middle.
3) Make it flashy, readable, and spell correctly! lol. After all, the text is the main thing people will be looking at when they see your banner. So might as well make it look nice.
4) If you know how to download and install fonts, I suggest roaming and surfing the internet for some cool looking ones. That way you're not just limited to your default ones.
5) Watermark
- Your last and final mark on your banner. A Watermark is a little symbol you put on all your artwork to show that it's YOU that made it, and no one else. It can be anything from a sprite, to initials. Mine is simply ©G2F, and you can find it usually in any corner of the banner.
- There aren't really any tips I can give you on your watermark. The only thing I can say is don't let it take away from the banner. But make sure it's some what seeable so when people see it they can say "Oh... "insert your name" made this, very nice".
Here is the final Product:
And there you have it Boys and Girls. The end of my tutorial. I hope you all took something away from this, and hope that I have helped a few of you. This will be edited here and there with other peoples Ideas and everything. To start, here's some of MY last minute tips that you can think of when making artwork:
George2FRESH:
1) Don't be afraid to experiment! Experiment is half the creativity. If you don't experiment, you'll never know how far your imagination can take you.
2) Try different styles. Sticking with one style is alright, but would you want ALL your artwork to look the same?
3) Play around with effects: Shadowing, Transparencies, lighting, glows, etc. to make your artwork really flashy.
4) NEVER give up. PRACTICE PRACTICE PRACTICE. When I first got Photoshop, I didn't know what to do, how to start. And it sat on my computer for about 2 months before I started using it. It took me another 2-3 months to finally get it down.
5) Take a look around at other peoples works. Get ideas, see what they did and try to do it yourself.
6) You don't have to stick with what you've got. You can change the color of things, the transparency, whatever you want.
7)Use your mind to create things you don't think you can. Is your picture missin part of it's tail? Draw one. If you take a look at my Photobucket, and look at the Garchomp banner, you can see it has the other half his tail. If you look at the tail on the card, it's missing. I just simply cropped it out, copied it, flipped it, and pasted it. Didn't notice huh? It's those kind of things that make you feel really smart once you complete it. =]
And so it is done. Thanks for reading everyone, hope you had fun! Take care, and Happy Art-Making!
Any questions/comments/suggestions feel free to PM me
-G2F


